使用 GitHub Actions 实现博客自动化部署
介绍
Github Actions 可以很方便实现 CI/CD 工作流,类似 Travis 的用法,来帮我们完成一些工作,比如实现自动化测试、打包、部署等操作。当我们运行 Jobs 时,它会创建一个容器 (runner),容器支持:Ubuntu、Windows 和 MacOS 等系统,在容器中我们可以安装软件,利用安装的软件帮我们处理一些数据,然后把处理好的数据推送到某个地方。[^1]
本文将介绍利用 Github Actions 实现自动部署 hexo 到 Github Pages,在之前我们需要写完文章执行 hexo generate --deploy 来部署,当你文章比较多的时候,可能还需要等待很久,而且还可能会遇到本地安装的 Node.js 版本与 Hexo 不兼容的问题,目前我就是因为电脑的 Node.js 版本升到 v14 版本导致与 Hexo 不兼容部署不了,才来捣腾 Github Actions 功能的。利用 Github Actions 你将会没有这些烦恼。
准备工作
创建所需仓库
- 创建
blog仓库用来存放Hexo项目 - 创建
yourname.github.io仓库用来存放静态博客页面
生成部署密钥
一路按回车直到生成成功
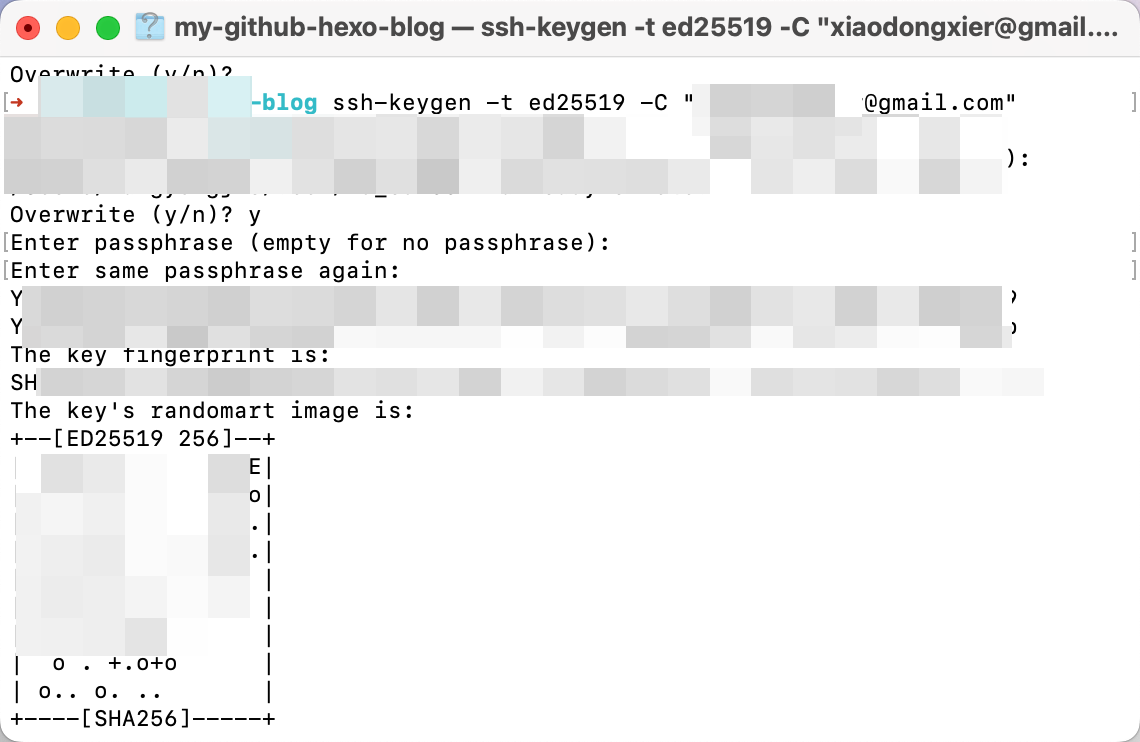
记得跳过密码啥的,这里连按三次回车就好 (刚开始回车后以为要输入开机密码获取权限就输入了密码,结果执行的时候一直权限问题执行不成功,找了好久好久的原因,浪费了很多时间😭)[^2]
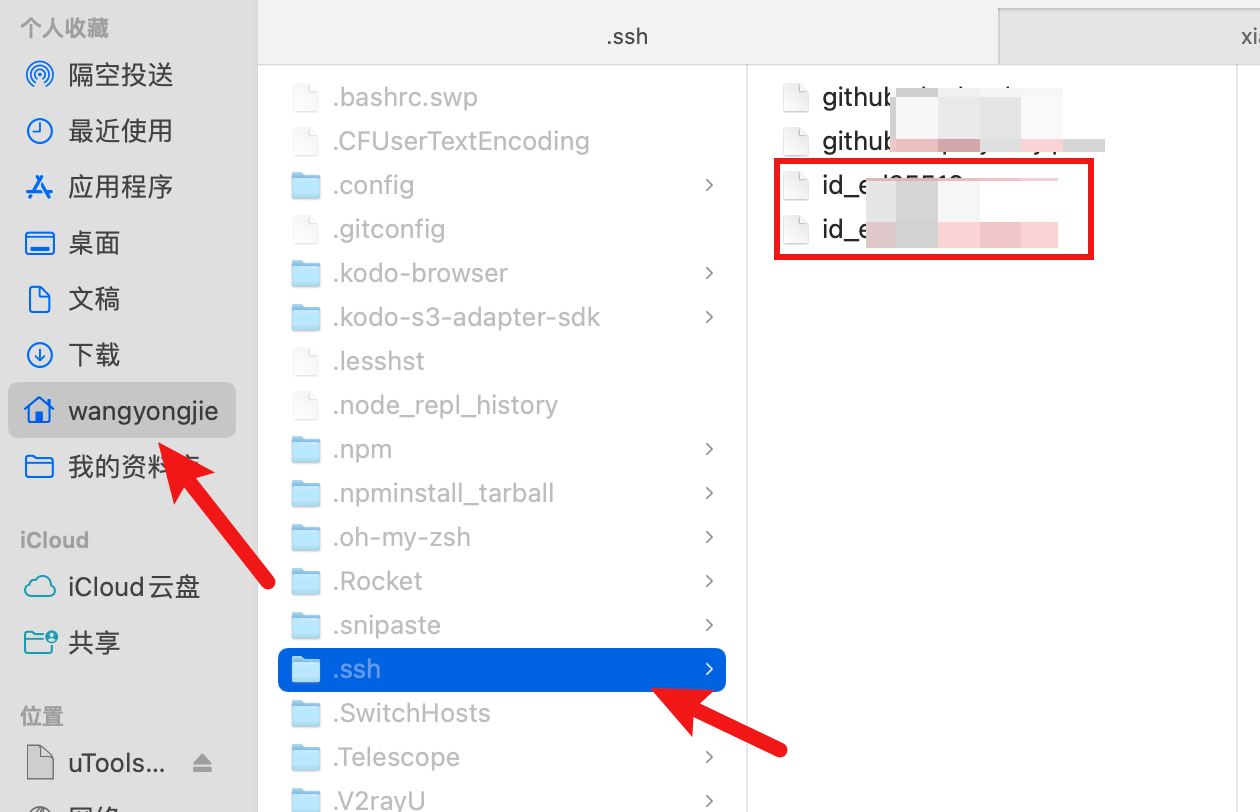
目录下会有 id_ed25519 和 id_ed25519.pub 两个文件,生成的文件位置如图(需要打开隐藏文件显示)
配置 SSH
blog 仓库配置
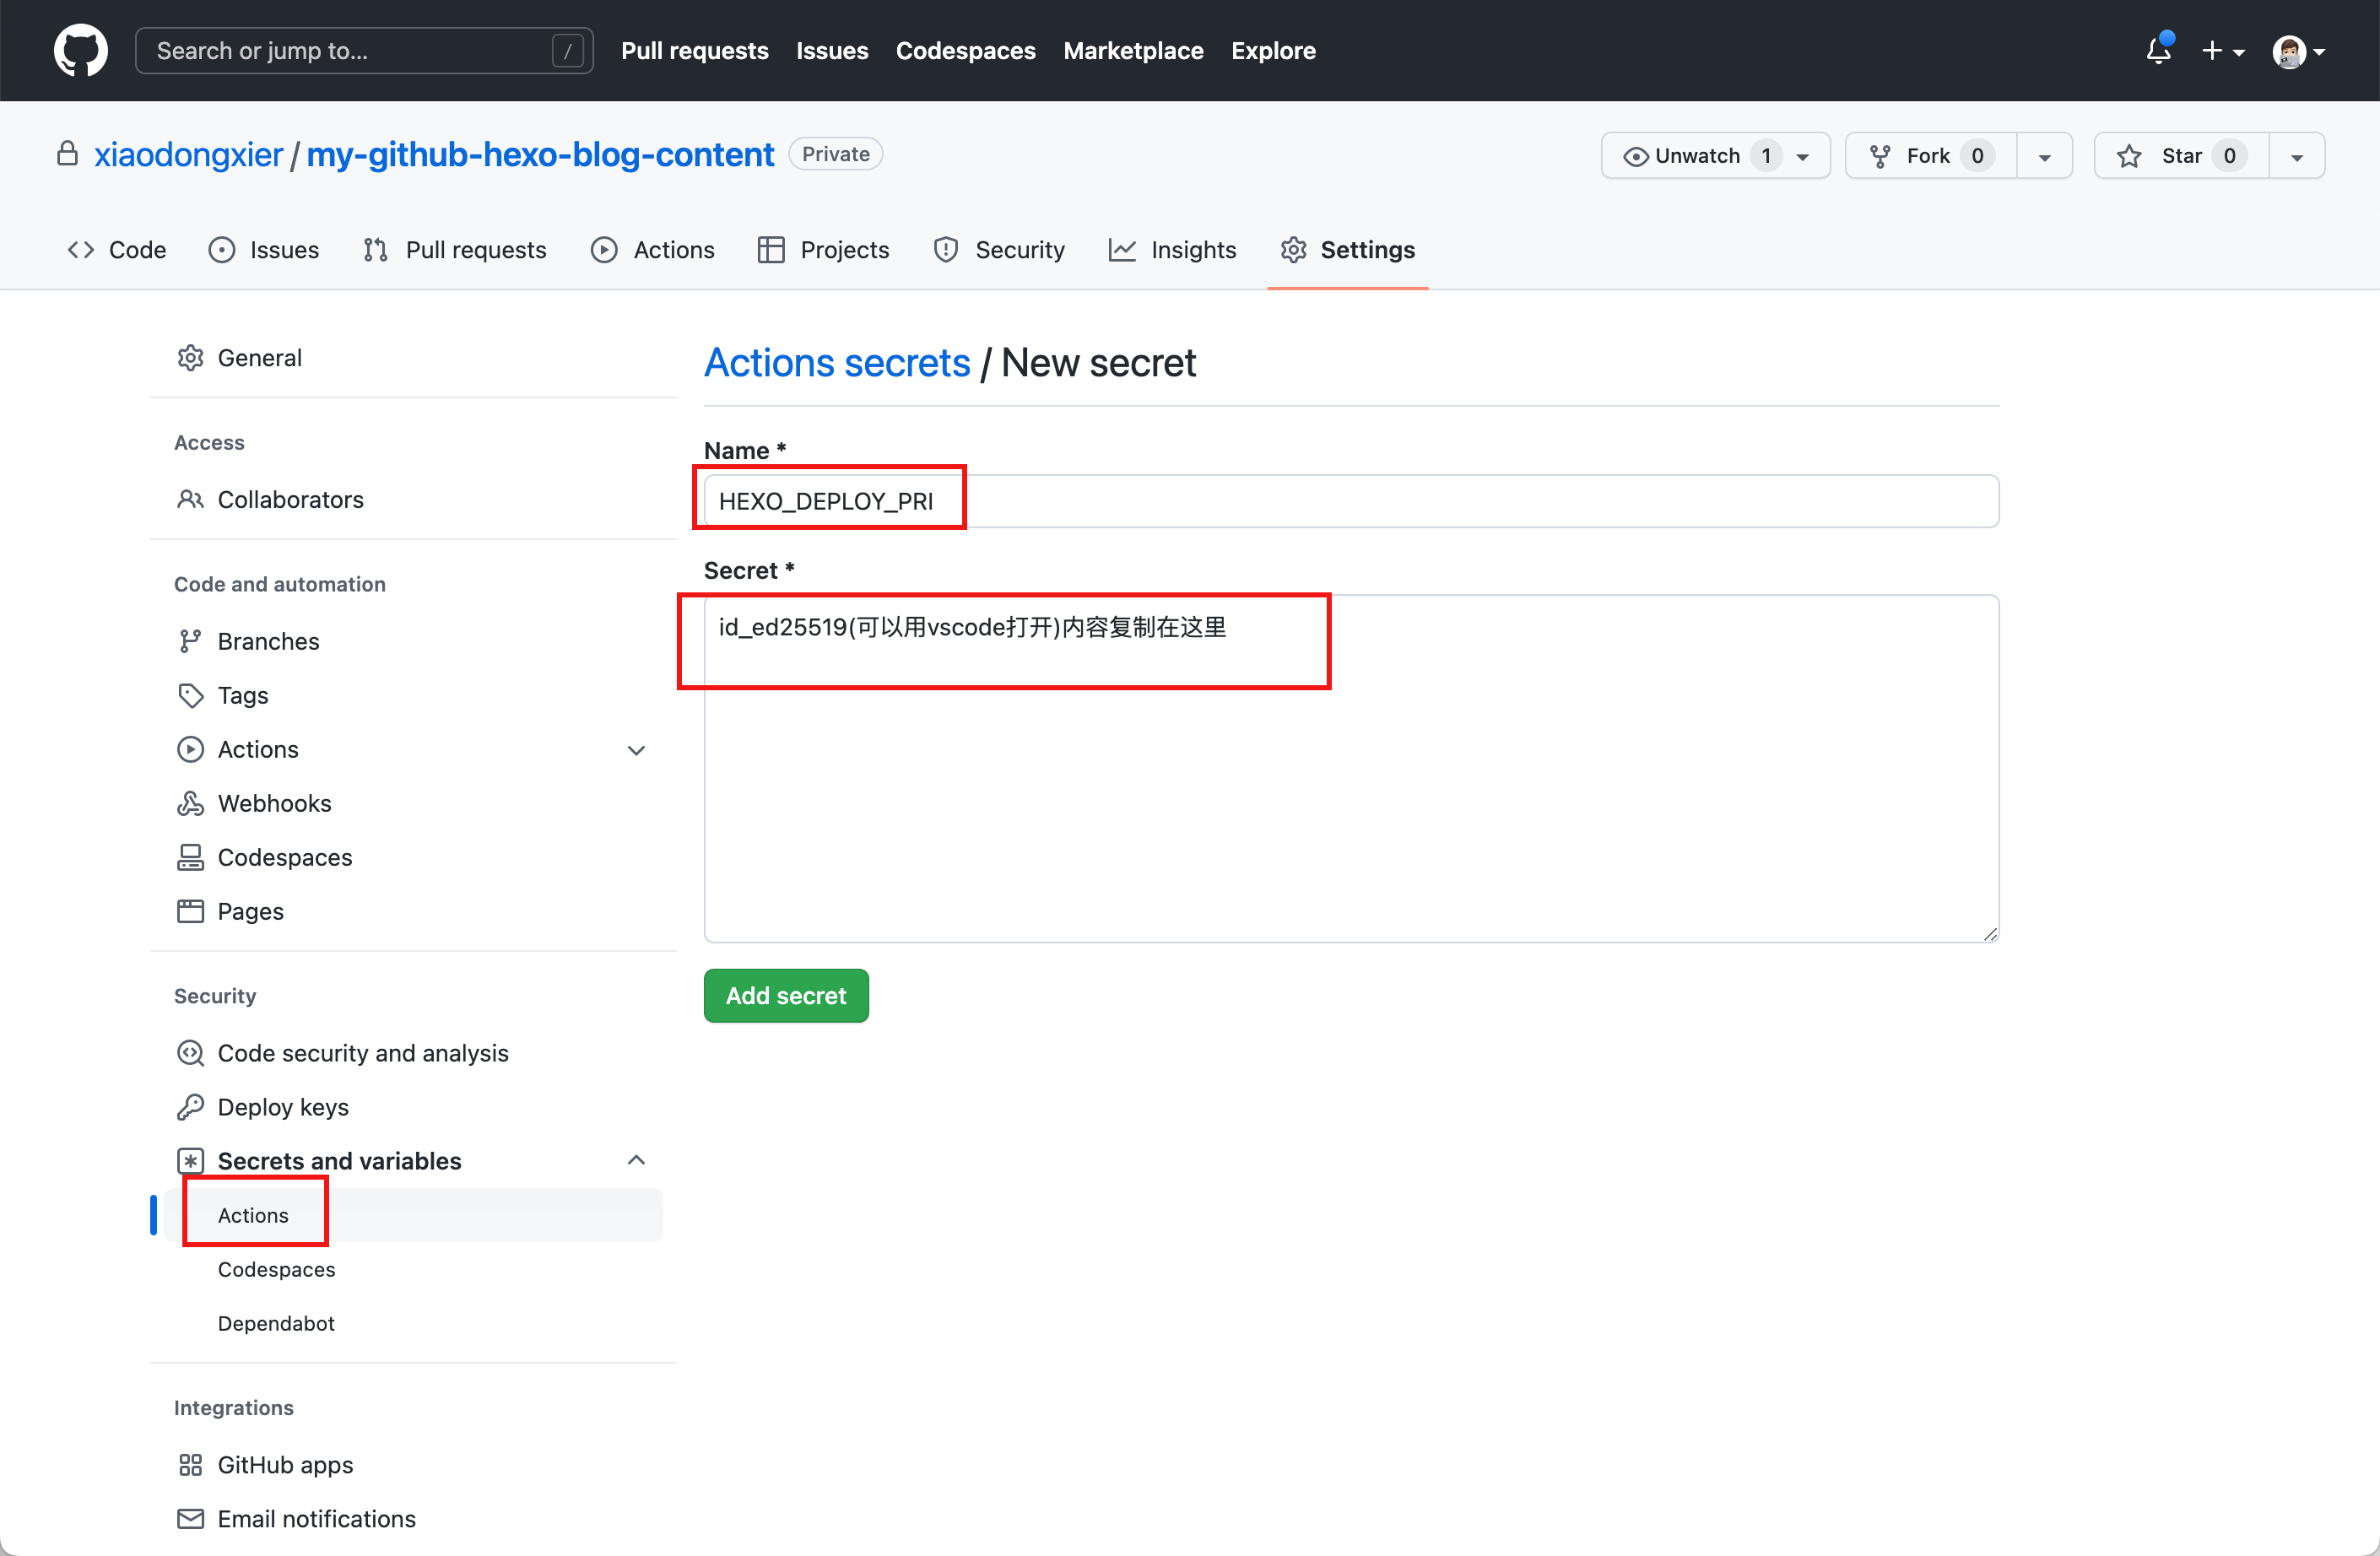
复制 id_ed25519 文件内容,在 blog 仓库 Settings -> Secrets -> Add a new secret 页面上添加。
- 在
Name输入框填写HEXO_DEPLOY_PRI。 - 在
Value输入框填写id_ed25519文件内容。
yourname.github.io 仓库配置
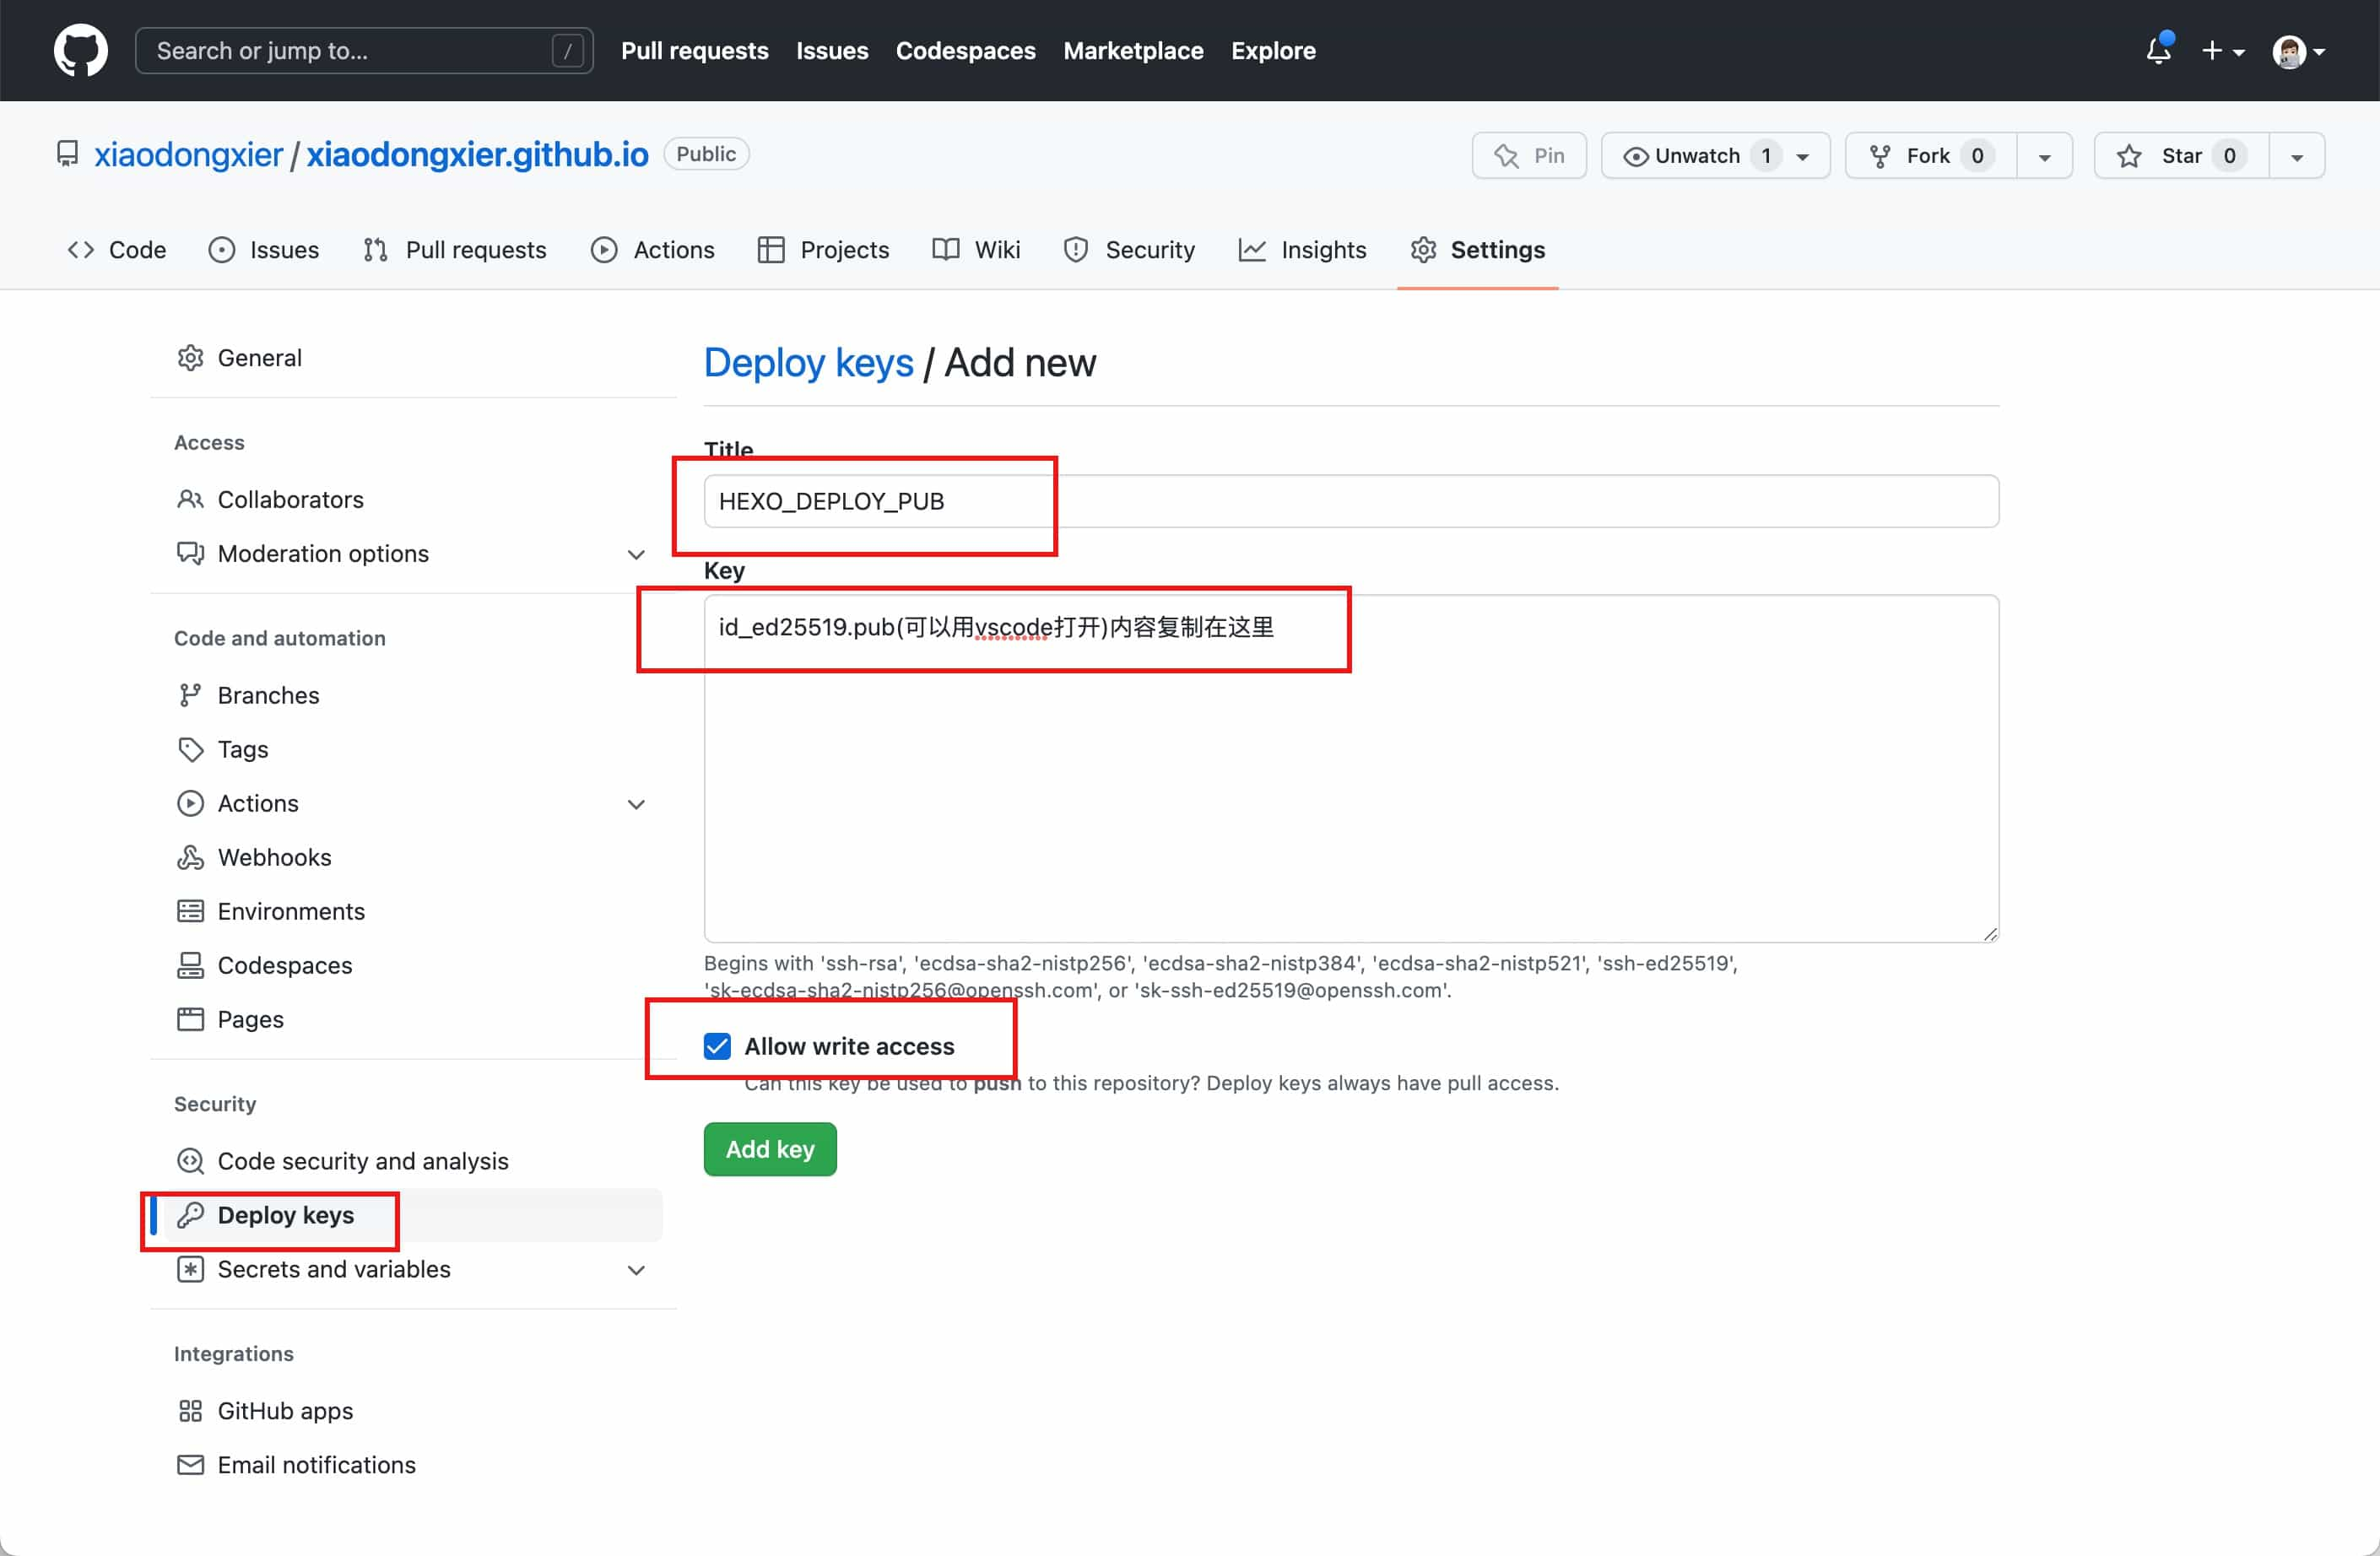
复制 id_ed25519.pub 文件内容,在 yourname.github.io 仓库 Settings -> Deploy keys -> Add deploy key 页面上添加。
- 在
Title输入框填写HEXO_DEPLOY_PUB。 - 在
Key输入框填写github-deploy-key.pub文件内容。 - 勾选
Allow write access选项。
配置 hexo-deployer-git
安装 hexo-deployer-git。
然后在 _config.yml 中添加以下内容
编写 Workflow
在 blog 仓库根目录下创建 .github/workflows/deploy.yml 文件,目录结构如下。
在 deploy.yml 文件中粘贴以下内容( 替换 youname 内容)
name: CI
on: push

jobs:
  deployment:
    runs-on: ubuntu-latest
    name: Deployment

    steps:
      - name: Check Out
        uses: actions/checkout@v3

      - name: Clone Repo
        uses: actions/checkout@v3
        with:
          repository: youname/youname.github.io
          path: .deploy_git

      - name: Setup Node
        uses: actions/setup-node@v3
        with:
          node-version: 16

      - name: Setup Git
        run: |
          git config --global user.name "youname"
          git config --global user.email "youname@gmail.com"

      - name: Setup SSH Key
        run: |
          sudo timedatectl set-timezone "Asia/Shanghai"
          mkdir -p ~/.ssh
          echo "${{ secrets.HEXO_DEPLOY_PRI }}" > ~/.ssh/id_ed25519
          chmod 600 ~/.ssh/id_ed25519

      - name: Deploy
        run: |
          npm install --location=global hexo-cli
          npm install
          hexo d
Workflow 解析[^3]
两个 Checkout 的作用是切换到博客仓库最新提交,并且将部署仓库克隆到 .deploy_git,也就是 Hexo 的部署目录。
- name: Check Out
    uses: actions/checkout@v3

- name: Clone Repo
  uses: actions/checkout@v3
  with:
   repository: Username/Repository
   path: .deploy_git
下一步安装 Node,版本需要与博客使用的版本相同。
设置提交的用户名和邮箱。
- name: Setup Git
  run: |
    git config --global user.name "Example"
    git config --global user.email "email@example.com"
将存储在仓库 Secrets 的 SSH 私钥存储到本地供 Git 使用。mkdir 是为了下一步可以在 ~/.ssh 目录中创建文件,chmod 设置权限,Git 才能使用私钥
- name: Setup SSH Key
  run: |
    mkdir -p ~/.ssh
    echo "${{ secrets.SSH_DEPLOY_KEY }}" > ~/.ssh/id_ed25519
    chmod 600 ~/.ssh/id_ed25519
最后安装 Hexo 和依赖,运行 hexo d 部署博客。
执行任务
写一篇文章,push 到 blog 仓库的 master 分支,在此仓库 Actions 页面查看当前 task。
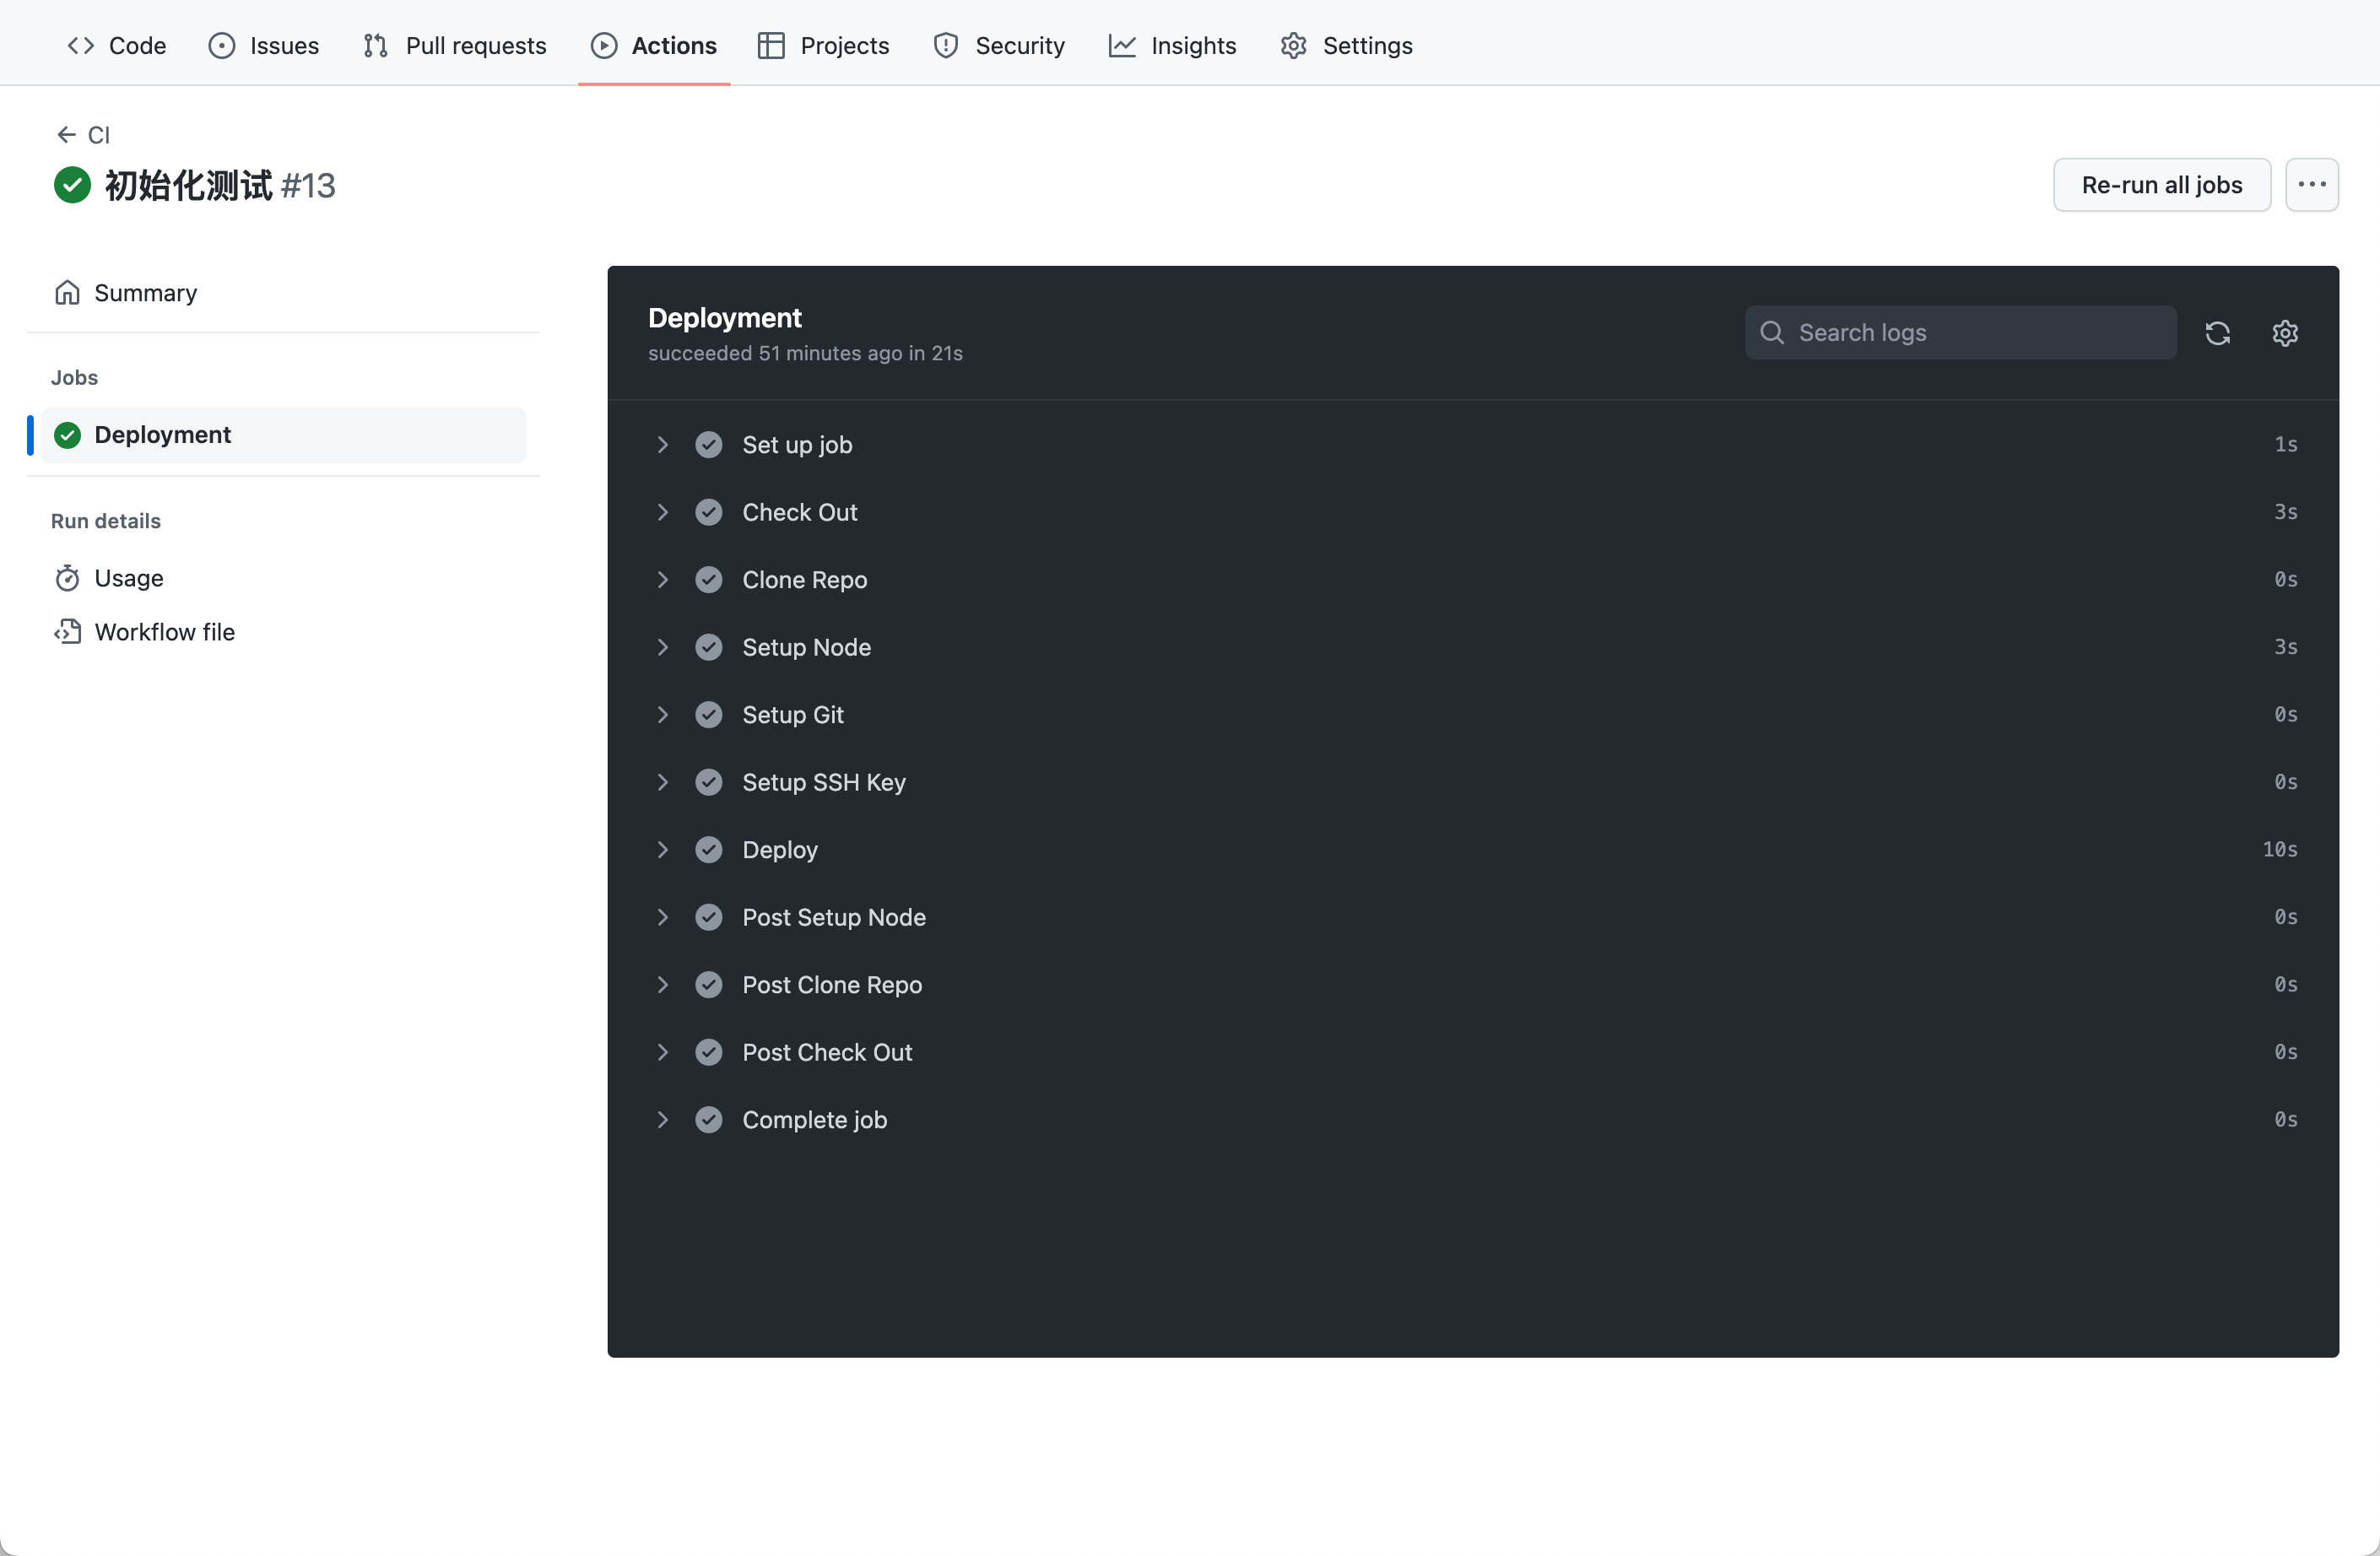
到此为止就结束了,等待执行部署完成大概2分钟后就可以通过网站查看发布的文章内容了
参考文献
[^1]: 利用 Github Actions 自动部署 Hexo 博客 [^2]: hexo配合github action 自动构建(多种形式) [^3]: GitHub Actions 自动部署 Hexo 博客